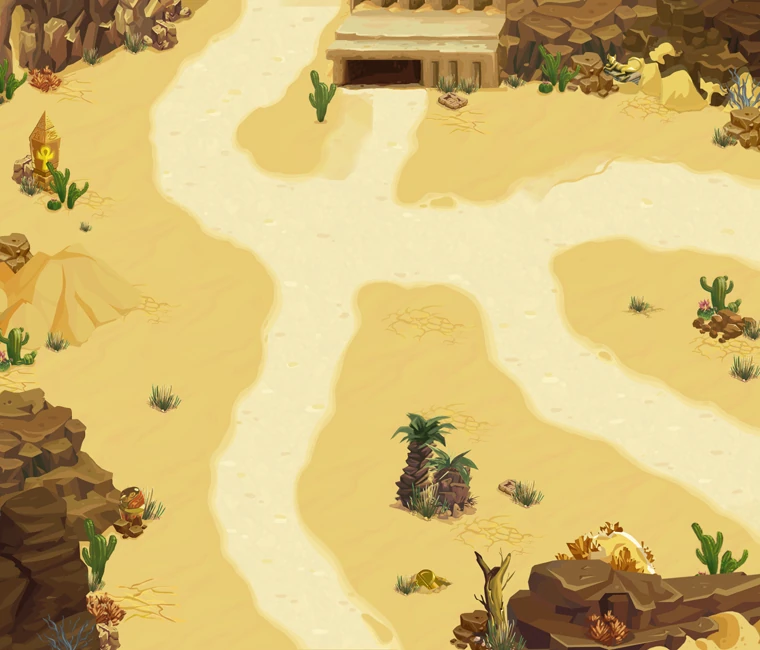
The Desert is the fourth world zone, after Lava Plains and before Marshlands
You need to be Kingdom Level 30 to fight here.
The bonus scenario (Desert's Grave) is unlocked after you beat all basic scenarios with 3 stars, on every difficulty level.
The Boss of the Desert is Dragon Immortalis.
Maximum stars: 81 (8 maps + bonus)
Previous section: Lava Plains
Next section: Marshlands
| In the following tables you will see a column titled "Life/Atk scale". These are modifiers to the monsters set by the level. That means if a monster/boss have basic 30k life, and the level modifier of life is 2, that monster will have 60k life. If e.g. Life/Atk scale is 3/2 the monsters will have three times as much health and twice the attack power. |

the desert
General Strategy[]
Enemies[]
Some enemies you may find here are:
- Skeleton
- Desert Coyote
- Giant Scorpion
- Skorpio
- Desert Bandit
- Sandworm
- Bone King
- Anubian
- Necromancer
- Advisor of Hell
- Mummy
- Vulture
Boss[]
Dragon Immortalis. A skeleton dragon. Special Moves:
- Summons black tornadoes to disrupt towers on its path. Can't be canceled by clicking. It is also not very menacing.
- The boss performs a shouting animation. This will put an extra 10 seconds cooldown on all of your magic skills.
- Once defeated, he will come back alive five times, each time with much less health than before. Click as fast as you can to stop him from coming back to life.
Required Towers[]
The only tower really required is the Dragoon. No other tower or skill is critical. With Towers of Level 29 the whole zone will be a walk.
On some maps there will be a few Enraged Ursa Captains, so a well-leveled Tier 3 Mage will be useful. Geomancer with Punisher would be best, but it is not required. Witch would be good too, and best with Tornado, but also optional. Any of the two will be very useful on the next zone, the Marshlands, specially the Witch.
The Barrens[]
Time is not on our side. With every passing day the Orcs get stronger. They now summon skeletons to serve as their bone shield.Step up the pace brethren, we need to get to The Barrens before it is overrun.
| Mode | Live/Wave/Good | Exp/Gold | Item | Recs. Lv. | Life/Atk scale |
|---|---|---|---|---|---|
| Easy | 20/17/1450 | 610/105 | Quality Rainbow Ore 4% | 30 | 2.7/1 |
| Heroic | 5/1/1800 | 610/145 | Quality Rainbow Ore 7%
Pure Earth Essence 4% |
33 | 2.9/1 |
| Hard | 1/6/2000 | 610/205 | Quality Rainbow Ore 7%
Pure Earth Essence 4% Notch Rock 35% |
34 | 3.1/1 |
The Barrens Strategy[]
The 1st regular map of this zone.
- Easy: A simple rush. Entries right and bottom right are easy, numerous enemies. Mages on left, cannons and arrows on right. I found a singre Dragooner on the apex of the two right paths worked wonders. Put two arrow towers at the entrance of the cryps and the skeletons won't bother you. Reinforce with Sir Lance Alotte. Shower the giant scorpions with Static and Hail for good measure. Resources are plentiful and you will be upgrading everything to Tier 3 before the last wave. Done with Towers Level 29
- Heroic: 300 skeletons, 100 cactaren, plus 60 cactaren, plus 50 coyotes... this looks like a strong rush. All heroes to the center, 4 arrow towers on the bottom path where the fliers will come from. A barracks on the bottom right path, second spot. All the rest are cannons. Upgrade, upgrade, upgrade until 4 Dragooners are on the center. All militia to the centre. Bolts and Hail, as soon as you can, use them to thin the Giant Scorpions. It's frantic but not hard. Upgrade arrows as possible, resources will be plentiful. All to Hands of God. and then... a lull. After the 4th or 5th Dragooner, keep upgrading arrows. And after all are Tier 3... more Dragoons. At last... the Vultures. Not really hard but with much life. Reserve magic skills for them. Just wait... wait... wait a little bit more. This map is LONG. Don't move the heroes, keep it with the militia. Wait... And yes, there are enough goods to complety upgrade to Tier 3. Done with towers level 29. Skeletons will rise and die under your loyal Dragons. And keep rising... and keep dying... honestly this level was more a test of patience than skill.
- Hard: No fliers. Good. But you lack two of the central towers, and looks like another rush.
Again a rush and again cannons to defend. Once you manage to upgrade your main 4 Dragooners, it should be alright. Two barracks, one on the same place as before and another one to stall the orc throwers from the bottom. Rest is cannons, heroes in the middle. The armored enemies from bottom entrance may be a little more bothersome than before. But resources are plentiful, and you'll have everything on Tier 3 by the middle of Wave 5. I found myself calling waves early. You have little more to worry about than Hailing over the scorpions. Done with Towers Level 29.
Burial Grounds[]
A growing number of skeletons bubbling from the ground has increased soldiers' casualties.The situation is dangerious.
| Mode | Live/Wave/Good | Exp/Gold | Item | Recs. Lv. | Life/Atk scale |
|---|---|---|---|---|---|
| Easy | 20/19/1400 | 620/110 | Quality Rainbow Ore 6% | 30 | 2.7/1 |
| Heroic | 5/1/1600 | 620/150 | Quality Rainbow Ore 9%
Pure Earth Essence 6% |
33 | 5.2/1 |
| Hard | 1/6/2000 | 620/210 | Quality Rainbow Ore 9%
Pure Earth Essence 6% Notch Rock 35% |
34 | 3.1/1 |
Burial Grounds Strategy[]
The 2nd regular map of this zone.
- Easy: Place a cannon in front of the tomb, and the heroes as reinforcement. Then forget about it. Upgrade arrows and mages soon, because wave 4 are Vultures. Wave 7 too. After the previous rushes, this map will even seem slow. Careful with calling waves early, but if you are careful it's entirely possible. Arrows on the left, definitely, and magic on the right. Done with Tower Levels 29. Smokers on wave 17. A breeze. I even voluntarily underdeveloped the towers next to home. They saw absolutely no action.
- Heroic: No fliers. A strong rush at the start. Concentrate on strong AOE, specially in front of the temple. Don't neglect the wolf rush below. If you don't let the coyotes overrun you, your heroes and two cannons will keep the temple enemies at bay. Ursa Captains will be a major PITA. They may require a mage. I eventually brought them down with Lightning and Dragoons. Don't let the Dragoon-Auto-Killing-Machine at the top blind you to the moment when a single Purgatorist comes from the Temple, although your heroes will probably defeat it without help. Done with Towers levels 29
- Hard: The two main towers of the top are missing. I start with the classical two Dragoons in the middle of the two bottom routes, plus a couple of barracks. On the top, though, THAT's a skeleton rush. Your heroes will have to work overtime even if you supply them with abundant militia. Third dragoon goes there. Meanwhile the Giant Scorpions on the bottom right will soak your Hail, making time for the Coyote rush of wave 3. And you'd better be building two Archmages towers on the bottom left, just to pummel the armored enemies. A Hail or two may be needed for the Wave 3 skeleton swarm. But the plentiful resources will make almost easy to upgrade cannons until you get your unstoppable flaming army. All damaging towers to Tier 3 before I even upgraded a single barracks: this happens just before Wave 5. At the start of Wave 6, all towers are Tier 3 and I have an excess of 1800 goods, which were 5000 at the end. In the end, the Dragoon I build on the solitary spot near home hadn't seen action. Done with Towers level 29
- Alternative strategy for Hard: Dragooners, Dragooners, and more Dragooners. With Cannon Towers at level 30 I never needed anything else. For the skeletons from the top I had to use Ice Tempest (level 31) a few times (though Blizzard should be good enough for them), but that was it. The only times any enemies made it to my heroes was at the start, before I started upgrading to Dragooners.
Mirage Sands[]

The neighboring regions have been invaded by Orc influenced Cactaren, they must have been planning this for a long time. It seems that every step we take, they take two. I know you are exhausted but like they say, there is no rest for the weary. Set up our defenses in Mirage Sands and lets hope they give us a couple hours rest before attacking.
| Mode | Live/Wave/Good | Exp/Gold | Item | Recs. Lv. | Life/Atk scale |
|---|---|---|---|---|---|
| Easy | 20/18/1600 | 630/115 | Quality Rainbow Ore 8% | 31 | 2.8/1 |
| Heroic | 5/1/1600 | 630/155 | Quality Rainbow Ore 11%
Pure Earth Essence 8% |
34 | 3/1 |
| Hard | 1/6/1900 | 630/215 | Quality Rainbow Ore 11%
Pure Earth Essence 8% Notch Rock 35% |
35 | 3.2/1 |
Mirage Sands Strategy[]
The 3rd regular map of this zone.
- Easy: Supposedly there are fliers. Wave 1 is trivial, don't spend many resources to fight it. Wave 2 is a rush and I answer with a Dragooner. Waves 4 and 5 are Skorpions from top left. I put Arrows for future fliers. The beloved Ursa Captains from top right again a PITA, Archmage towers against them. The 3 central Dragooners are ready for wave 11. All towers on tier 3 in the middle of wave 17. Either there are no fliers on this map, or I killed them all too fast to see.
- Heroic: Fliers announced, nowhere to be seen. Big Rush + Ursa Captains. Or by another name, The Great Dragoneer Stravaganza. No other tower will absorb so many resources, kill so fast or sustain such a high firerate. Don't bother with anything else. Use skills, use heroes (they will die, a lot) and over all use many, many, Dragons.
- I had level 30 cannons and this was a walk in the park. The crossroads become a killing zone that nothing can get through.
- Hard: Made with towers level 29. No fliers although announced, so don't waste firepower on Arrow Towers like I did. This time two of the three central spots are gone. And Ursa Captains come from the top from the start. This scenario has:
- Many Ursa Captains. Two or three fully-upgraded mage towers at top, starting with Archmages for Wave 1, at least. Witches would have been more useful than Geomancers, but that's what I had at the moment.
- Rushes by Magma Elementals for the short path at bottom. Concentrate fire with Dragooners. I made it by the skin of my teeth, but then I had a Jungle Warfare tower there that was nearly useless. Should be easy with another Dragoon.
- Rush of Giant Scorpions on top left. Control with Dragooners.
- Plentiful resources
Interim Camp[]


Troops occupied Pyramid as its interim camp.The oasis in front of Pyramid can supply the troops,so that the king decided to stay here for a while.
| Mode | Live/Wave/Good | Exp/Gold | Item | Recs. Lv. | Life/Atk scale |
|---|---|---|---|---|---|
| Easy | 20/19/1500 | 640/120 | Quality Rainbow Ore 10% | 32 | 2.8/1 |
| Heroic | 5/1/1650 | 640/160 | Quality Rainbow Ore 13%
Pure Earth Essence 10% |
35 | 3.1/1 |
| Hard | 1/6/2000 | 640/220 | Quality Rainbow Ore 13%
Pure Earth Essence 10% Notch Rock 35% |
36 | 3.4/1 |
Interim Camp Strategy[]
The 4th regular map of this zone.
- Easy:
- 6x Dragoons on the two entrances, supported from behind by two basic barracks. Rest is basic arrow towers for the vultures. And upgrade, and keep upgrading cannons. They shall not pass.
- Fliers are Vultures on Wave 3 and Blood Wyverns on Wave 11. Not hard at all, and after this you can stop upgrading the arrow towers.
- On wave 13, after upgrading all 6 cannons to Dragoons, I upgraded barracks to Tier 2. Just because. And I stopped upgrading, because I just didn't need it. I had almost 7000 goods to spare at the end of the scenario.
- Wave 18 brings newcomers: the Anubians. They are, in fact, reasonably tough. It's not their fault they're scheduled to pop up under 3 Dragoons primed to fire, plus Sir Lance Alotte to tank them and Robin/Korina ready to offer some support. Done in seconds.
- Made with towers level 29-30, heroes 30, 26, 23
- Heroic: There are fliers, but they are only Blood Wyverns. The rest is a rush + Ursas & Banner Guards. But it's a very quick rush. Load up cannons, fast. Start funds allow for 6 Tier 1 Cannons. Upgrade quick, speed is essential. Fliers won't bother, deal with them with Hail, maybe a basic mage or arrow tower along the way. When you have your basic 6 Dragooners ready, prepare another 4 near home. Just in case. They probably won't need to act. Done in a few minutes. Made with towers level 29-30, heroes 30, 26, 23.
Alternately, you can build a basic lvl 1 barracks on the bottom left and bottom right slots, having the soldiers relayed straight upwards to focus enemies on the 2 dragoneers you're going to build directly above. Only enough starting gold to get 1 to dragoneer and you're going to have to leave the second as a Mortarer, then build 1 cannon beside each one. Throw down spells on whatever side needs it, pop the Mortarer up to Dragon ASAP. You're also going to want 2 assasins with fly cutter up at the top beside the home base, only really need one with fly cutter at first to help with the flyers. Besides that, build 2 cannon in the middle right below home base and just upgrade all cannons to dragons, you can sell the stuff at the bottom if you need funds to upgrade the top for the last little stretch if you need. Tested with lvl 35 Robin, 18 Durin and 20 Korina, all sitting right at home base. All towers and spells lvl 30, no specialties in Dragoneer, Fly Cutter and Explosive Shot on Assassin Syndicate (probably not fully needed). I do have Militia and Hail upgraded to second tier, and have a lot of talents invested into tower, but this method should be manageable without. All 5 HP remaining every time I try it, there are no spots where you're even in danger of cutting it close apart from the Ursa Captains, but a well timed hail/blizzard can take care of it.
- Hard: Again fliers, but the 2 center spots are gone. This calls for finesse, which is 4 Dragoons at bottom, another 4 at top. Upgrade first the bottom right ones, then top right, then bottom left, then top left. Hail over the scorpions. And build mage towers on the 2 remaining spots right and arrow towers left. Just in case. Fliers will come from bottom left on Wave 5. 2x Hands of God are enough, supported by Robin. Upgrade them if needed. And that's all fliers for today. Wave 6 is a standard desert rush. Complete top Dragoons, and you're done. Made with towers level 29-30, heroes 30, 26, 23
The Lone Stronghold[]


Well executed men! I knew I could count on your brains as well as your brawn!Through this waterfall lies the Long Stronghold where the Necromancers hold their campThey will be expecting us, but we can match their might!
| Mode | Live/Wave/Good | Exp/Gold | Item | Recs. Lv. | Life/Atk scale |
|---|---|---|---|---|---|
| Easy | 20/18/1600 | 650/125 | Quality Rainbow Ore 12% | 34 | 2.9/1 |
| Heroic | 5/1/1500 | 650/165 | Quality Rainbow Ore 15%
Pure Earth Essence 11% |
37 | 3.1/1 |
| Hard | 1/6/1800 | 650/225 | Quality Rainbow Ore 15%
Pure Earth Essence 11% Notch Rock 35% |
38 | 3.4/1 |
The Lone Stronghold Strategy[]
The 5th regular map of this zone.
- Easy: Surprise. Doesn't start as a rush. Anyway, as always, cannons on the middle, arrows on the perimeter. On Wave 5 we meet the lovely Bone Kings. Not very fast, not very armored, no match for Sir Lance Alotte, a couple of militia, and a Dragoon spitting fire. Waves 1 to 10 are basically cannon fodder (hehe). On Wave 11 we meet the "Advisor of Hell". Long range, light armor, summoner. Didn't we meet necromancers already? They all burn the same. I stop upgrading, don't need more firepower. Oops, Magma Elementals from top on wave 14. This is starting. And at last, wave 15, the fliers. 3 vultures from top. They die from magic before they reach the towers. Another 3 on Wave 17, dying from Hail. And lastly, 10 on wave 18. This is a challenge. I sell two Dragoons (I'm over 5500 accumulated goods at this point) to buy Arrows. Overkill. Hail and Lighting plus Robin/Korina make short work of them. Made with towers level 29-30, heroes 30, 26, 23
- Heroic: No fliers. You know what that means, right? A Hell of a rush. Not enough resources to increase all at the same time, let's concentrate on the orc rush from the left. 6 barracks, 8 cannons, and a new edition of the Dragooner Extravaganza. Once they started to come in the thick, I literally couldn't upgrade fast enough to consume the goods. After each tick, a tower was upgraded and there were goods to upgrade it again. Until all 8 Dragoons started to kill at once, then I upgrade barracks. When the flames dissipated, I was up to 6500 unused goods, and the map was done. Made with towers level 29-30, heroes 30, 26, 23.
- Ignore the above stategy. Maybe they made it more difficult. Just placing cannons all over the place isn't even enough to defeat the first rush. Instead I used the strategy in the video below, but just put dragoons everywhere instead of the bombards as I don't have those. Nothing made it to my heroes and soldiers near the goal. Super Easy.
- https://www.youtube.com/watch?v=XDnDYMasjOA
- Hard: Two central spots removed, but still no fliers. So... by the start of wave 3, you can have 3 Dragoons at the top spots, with a barracks a Sir Lance Alotte guarding the Bone King flank. By the start of wave 5, the defensive perimeter is complete, and just have to upgrade barracks. Your heroes might even need to retreat a little from the necromancer onslaught. Made with towers level 29-30, heroes 30, 26, 23
Marching Rescuer[]


After learning that the spearhead was trapped,the king sent a large force to rescue them promptly.However,met a resistence from orcs out of valleys
| Mode | Live/Wave/Good | Exp/Gold | Item | Recs. Lv. | Life/Atk scale |
|---|---|---|---|---|---|
| Easy | 20/18/1800 | 660/130 | Quality Rainbow Ore 14% | 35 | 3/1 |
| Heroic | 5/1/1800 | 660/170 | Quality Rainbow Ore 17%
Pure Earth Essence 12% |
38 | 3.2/1 |
| Hard | 1/6/2000 | 660/230 | Quality Rainbow Ore 17%
Pure Earth Essence 12% Notch Rock 35% |
39 | 3.5/1 |
Marching Rescuer Strategy[]
The 6th regular map of this zone.
- Easy: Fliers, a tomb with a short path, and all the marks of *yet another* rush. I save 4 spots for arrows, and line the path with cannons. The first reasonable menace, 2x Magma Elemental, appear on wave 12. At that moment I already have 5 Dragooners, and 4 Assasin Towers built. Fliers from bottom entry: Wave 13, 8x Vultures. Wave 14, 10x Vultures. Wave 15: 10x Vultures. Wave 18: 10x Vultures. On the end of wave 16, I ramp up my defense to 8 Dragoons, 4 Assassins, 2 Jungle Warfare, and 1 barracks. Done with towers level 29-30, heroes 30, 26, 23. Next!
- Heroic: Fliers, 13x Vulture from right. The real rush is going to be the necromancers' from the bottom. I probably overkilled the birds. Save the spot nearest home. Place Sir Lance Alotte to control the tomb along a triangle of dragons and a barracks. Another triangle of dragons and a barracks will cover the bottom. And a combination of dragons and arrows for the rest, with Robin/Korina as backup in case the fliers get past. Done with towers level 29-30, heroes 30, 26, 23. Next!
- Hard: Missing two central towers. As for the rest, no difference from Heroic. I have 7 Dragoons at the start of Wave 4, build arrows, upgrade barracks, and wait. Fliers (10 vultures) come from bottom on wave 6. I change an arrow tower for a Dragon, and the barracks next to home for an Arrow (and still have over 2000 goods left). When fliers appear, I rain Hail, and harass them with Robin/Korina. Let the dragons finish the rest. Done with towers level 29-30, heroes 30, 26, 23. Next!
Prospect Of Victory[]


The main forces and spearhead rushed out of valley after a tough battle.While the king decided to kill off all the emerging enemies.
| Mode | Live/Wave/Good | Exp/Gold | Item | Recs. Lv. | Life/Atk scale |
|---|---|---|---|---|---|
| Easy | 20/14/2000 | 670/135 | Quality Rainbow Ore 16% | 36 | 3.1/1 |
| Heroic | 5/1/1600 | 670/175 | Quality Rainbow Ore 19%
Pure Earth Essence 13% |
39 | 3.3/1.1 |
| Hard | 1/6/1800 | 670/235 | Quality Rainbow Ore 19%
Pure Earth Essence 13% Notch Rock 35% |
40 | 3.6/1.1 |
Prospect of Victory Strategy[]
The 7th regular map of this zone. Also, very exploitable later to get Hero Experience from Battle plus a good pile of gold, Kingdom Experience and resources, in a partially-unattended mode.
- Easy: Fliers + rush, as usual. I start with a Dragoon next to the tomb, keeps skeletons contained. Fliers weak, but early. Wave 2, Blood Wyvern, from top and left. Wave 6, 10x and 8x Smokers, from top and left. Full upgrade to arrow towers, but they are confused among the rest. Death by skills and heroes. 6 Dragoons keep the rest of the wave away. I increase to 7 and upgrade the arrows. Wave 10, 8x Smokers from top. Death by skills and towers. No more fliers. Sit, relax, enjoy. Done with towers level 29-30, heroes 30, 26, 23, over 5700 goods left at the end. Next!
- Heroic: Fliers: 10x Blood Wyvern from top. Rest is the usual rush. I start same as Easy. They don't take long, but they come well-grouped. A single Hail takes care of them. Dragoon on. Done with towers level 29-30, heroes 30, 26, 23, over 6500 goods left at the end. Next!
- Hard: Two central towers missing. Fliers on wave 1: 20x Blood Wyvern and 30x Coyotes from top and the same from left. This looks like Arrow Towers Galore. 20x more on Wave 2. Afterwards it becomes a common rush, without heavy armored enemies. But the Desert Bandits from the tomb become bothersome. Two barracks and the heroes will contain them, but they may need some Hail. You will probably need to sell arrow towers to replace with Dragoons after wave 3, but resources are aplenty. Done with towers level 29-30, heroes 30, 26, 23. Next!
- Exploitation Strategy
On Hard mode, start with 2x barracks on home (top and bottom), deploy them near home, with the 3 heroes among them. 8x arrow towers (basic) covering entrances, plus another next to the missing spot near home. Leave the two spots next to the tomb (up and left) empty. Upgrade the arrow tower near home and the 4x between the two paths to Hands of God (3 of them can be upgraded at the start, the other two once the first group of Wyverns die by Hail). Do not stagger coyotes, for they run ahead of the fliers. Once you have the 5x Hands of God, build and upgrade cannon near home to Dragoon (ready for the start of Wave 3). Then build the next Dragoon beside the tomb. At the start of Wave 3 you'll dispatch the last Wyverns. Then the magic starts. Once you have the two spots near the tomb on Dragoon, upgrade both Barracks once, sell the Arrow Tower next to home, build cannon, upgrade. Sell another tower, upgrade cannon. Sell another tower, upgrade Dragoon. Upgrade the two barracks to Paladins. Keep selling Arrows and building Cannons, first the central ones, then the entrance ones. You should upgrade first the cannons of the left. No magic skills needed past wave 3. Just one Hail on Wave 1, and another on wave 2, for fliers (but since you're upgrading, you can rain hell as you like. If you do, prioritize the Desert Bandits from the tomb, as they die from Hail and give many goods). No attention needed (you can leave it to complete alone) once all Dragoons in place (though unfortunately that's almost until wave 6). But if are playing the whole scenario, Waves 4, 5 and 6 can be called early, and finished early with Hail over Skorpios. Total playing time: less than 10 minutes.
Calamityville[]


Another terrible battle scene beholds my eyes…I don't know what happened here and maybe I don't want to but Vultures skim the ground and litter the sky.How fitting, that sign says CalamityvilleIt looks like whatever happened here is coming for us next, to attention!
| Mode | Live/Wave/Good | Exp/Gold | Item | Recs. Lv. | Life/Atk scale |
|---|---|---|---|---|---|
| Easy | 20/16/1800 | 680/140 | Quality Rainbow Ore 18% | 38 | 3.3/1.1 |
| Heroic | 5/1/2400 | 680/180 | Quality Fairy Wood 4%
Pure Air Essence 2.5% |
41 | 3.5/1.2 |
| Hard | 1/6/2000 | 680/240 | Quality Fairy Wood 5.5%
Pure Air Essence 4% Notch Rock 35% |
42 | 3.8/1.3 |
Calamityville Strategy[]
The 8th and last regular map of this zone. You will fight the boss (Dragon Inmortalis) here, but he is not hard at all.
- Easy: It announces fliers, but then there are none. Waves 1-12 are little more than filling. By Wave 10, you can have 7 Dragoons, on the two obvious triangles (top left and middle) and in the middle of top and right paths. No other towers needed. Stockpile goods. Call waves early if you want. Wave 13 has 4x Advisor of Hell Elite, that will calmly walk to their fiery demise. Filling. Too easy, at least until Wave 16, with Dragon Inmortalis (and Necromancers, who at least summon extra armies). 5700 goods before Wave 16, then I spend *almost* all of them to *double* the number of Dragoons, all spots filled. Oh, there are also mummies. They burn like the rest. Just to joke, I don't click the dragon, I leave it to resurrect. Dragon 1: 1.980.000 HP. Dragon 2: 660.000 HP. Dragon 3: 220.000 HP. Dragon 4: Dies too quickly to see. Dragon 6: 8148 HP. He. Hehehehe. This was fun. Done with towers level 29-30, heroes 30, 26, 23. Next!
- If your towers are dangerously low level (mine were at Level 20 and I got 3 stars first try!) have one of each tower at the bottom. The lowest position should be a maxed-out Soldier Tower. Then just build up Towers slowly from bottom to top. Don't just randomly use magic and don't bother with any other soldiers. Magic should be used when needed, there will be "almost lost it" points. Then just sit back and wait for the explosions! When the Dragon Immortalis dies, click him like crazy- if he regenerates just once he will be really hard to beat.
- Heroic: Says fliers, but there are not. Two! Dragon Inmortalis. Well, I repeat Easy strategy. Probably could be optimized. Starts with Dragon Inmortalis on left path. I start with 6 Tier 1 Cannons and a Dragoon on the rightmost spot. But I start upgrading and clicking like crazy, and seems impossible but I start to kill everything. Then the second dragon appears while the first is still on. But he is in the middle of 7-8 Dragoons and is killed. At the second respawn I manage to click it into final death, leaving just the second one from right path. AND now it has more life. 2.100.000 HP first life, and I manage to avoid it getting up again. Done. Not easy but certainly quick. Done with towers level 29-30, heroes 30, 26, 23. Next!
- Hard: Two of the spots of my basic strategy are missing. But I can expand the bottom triangle, and take the spot in the upper right of the previous one, and I can try like this. And it works. Keep upgrading, after 6-7 Dragoons stockpile, and build rest of Dragoons before wave 6. Dragon Inmortalis from left. 2.280.000 HP. Aaaaand... definitely possible. I love killing dragons with dragon towers. Done with towers level 29-30, heroes 30, 26, 23.
Desert's Grave[]

Those that enter Desert's Grave rarely ever live to tell the storyA desert dry and hot as a burnt coal, don't expect life to get any easier.
| Mode | Live/Wave/Good | Exp/Gold | Item | Recs. Lv. | Life/Atk scale |
|---|---|---|---|---|---|
| Easy | 20/13/2700 | 710/150 | Quality Fairy Wood 4% | 40 | 4/1 |
| Heroic | 20/10/3100 | 710/190 | Quality Fairy Wood 5.5%
Pure Air Essence 4% |
42 | 4.2/1.2 |
| Hard | 20/14/3000 | 710/250 | Quality Fairy Wood 6.5%
Pure Air Essence 5% Notch Rock 35% |
43 | 4.3/1.3 |
Desert's Grave Strategy[]
The bonus map of this zone. To unlock, defeat all the other maps with 3 stars on all difficulties. You will also fight the boss (Dragon Inmortalis) here.
- Easy: This time fliers are to be reckoned with. 6x Vulture from each Top path on wave 2. 8x Vultures from left on wave 3. And also on wave 4 and 5, from top. Build arrow towes in the two bottom spots bordering the map, and next to home. Robin and Korina will work extra, as well as Hail. The top right spot is also a good place to put an arrow tower. All center to cannons, with a barracks for each corridor except the rightmost one. At the start of wave 8 your cannons should be firmly established, with at least 8 Dragoons. More Vultures on Wave 8, and 9. And by Wave 9 everything will be at Tier 3, even Barracks. More Vultures on Wave 11, and wave 12. I only note them because they are the only thing to fear. Without fliers, no heroes would even see action at this point. Dragon Inmortalis with 2.400.000 life. Over 9000 (no pun intended) unused goods at the end. Done with towers level 30, Tier 2 skills, heroes 30, 26, 24. Next!
- Heroic: An unusual Heroic. 10 waves, 20 lifes. Exactly the same layout as Easy, but arrow towers should be upgraded sooner. 10x vultures from each top path on wave 4, on two separate groups each. 8x more on wave 5. Dragon Inmortalis (2.520.000 HP) on wave 6. 8x Vultures on Wave 9. By the last wave you should have killed (maybe twice) the first Dragon Inmortalis, because there is a second one. Done with towers level 30, Tier 2 skills, heroes 30, 26, 24. Next!
- Hard: An unusual Hard. No missing tower spots, 20 lifes, 14 waves. Again the same layout, again vultures on waves 3, 4, 6, 8, 11, 13, 14. This time the Cactaren Rushes are enough to go through the heroes. And Dragon Inmortalis appears on Wave 5. Upgrading barracks is a must and goods are not plentiful (at least at the start). A Wolfsbane appears on wave 7. Oooh this is going to be good. Another Dragon Inmortalis on Wave 8. You better avoid the first one reviving, for he distracts shoots from the Vultures. I even had to sell a barracks to change it into a Arrow Tower. A Heart of Winter on Wave 11. 24x! Vultures on Wave 13. And more vultures on 14, plus (of course) another Dragon Inmortalis. I sell the last barracks, and even a Dragoon, to make room for Mages (they shoot harder). Despite this squander, still more than 11000 unused good by the end of the map. Done with towers level 30, Tier 2 skills, heroes 30, 26, 24. Next!